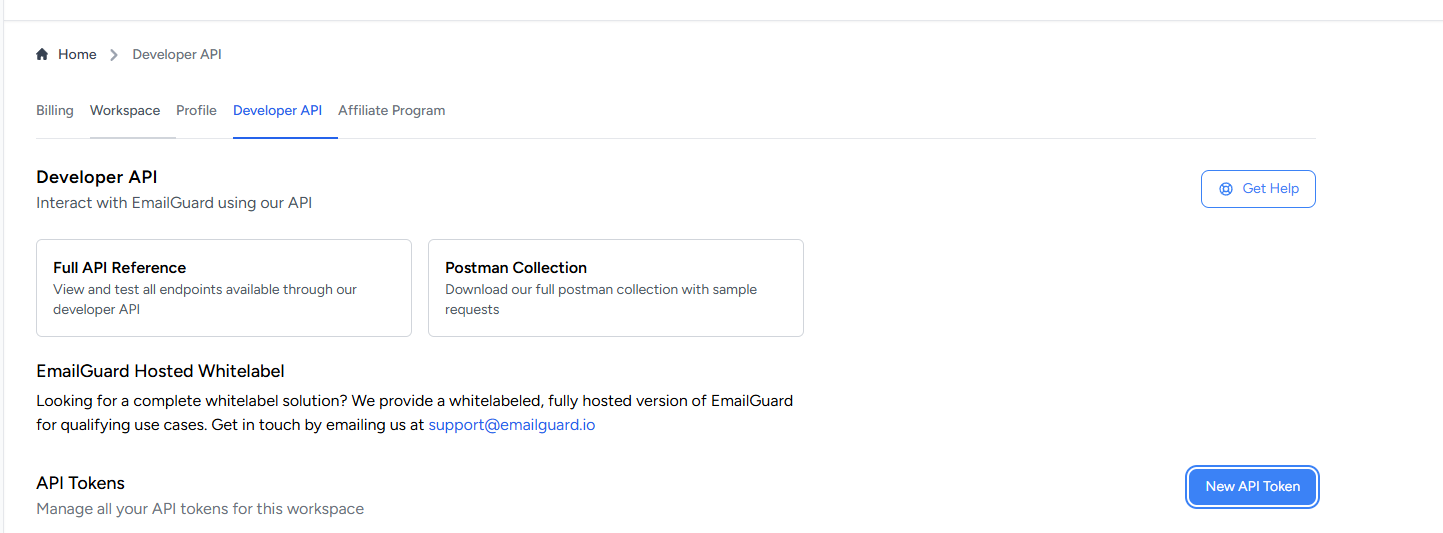
You'll need an API token to authenticate your requests. Here's how to grab one:
Navigate to Account Settings in your EmailGuard dashboard
Click on Developer API
Create a new API token
Copy it somewhere safe—you'll need it for the headers in your API requests
First, you'll make a POST request to EmailGuard's spam filter test endpoint:
Endpoint: https://app.emailguard.io/api/v1/spam-filter-tests
Headers:
Authorization: Bearer [YOUR_API_TOKEN_HERE]Body:
json
{
  "name": EG API DEMO"
}
The name parameter is simply a label for this test, use something descriptive so you can identify it later.
When you make this request, EmailGuard will respond with the following:
{
    "data": {
        "uuid": "a08a75e7-28c1-44db-a414-a28021c99e69",
        "name": "EG API DEMO",
        "status": "waiting_for_email",
        "spam_filter_email_address": "[email protected]",
        "sent_from": null,
        "sending_server_ip": "Unknown",
        "score": null,
        "score_breakdown": null
    }
}Here's what each field means:
uuid - The unique identifier for this test. Keep this handy, you'll need it to fetch your results later
name - The name you gave the test (in this case, "EG API DEMO")
status - Shows where the test is at in the process. Right now it's waiting_for_email, meaning EmailGuard is ready for you to send your email
spam_filter_email_address - This is the key field, the email address you need to send your test email to
sent_from - Will populate with the email address you sent from once you send the email
sending_server_ip - Will show the IP address your email was sent from
score - Will contain your overall spam score after the email is analyzed (currently null since we haven't sent anything yet)
score_breakdown - Will contain detailed scoring information once the test completes
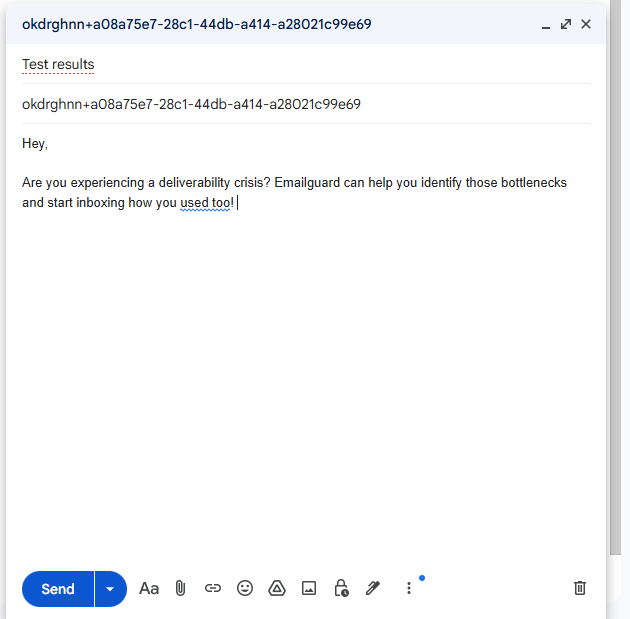
Now comes the easy part, just send your actual email to the spam_filter_email_address from the response above. This should be the same email you'd send to your prospects:
Include all your typical content
Send it exactly as you would in production
EmailGuard will run it through spam filters and analyze it for you.
Step 3: Fetch Your Results
Once EmailGuard processes your email (usually within a few seconds), you can fetch the results using the uuid from Step 1.
Endpoint: https://app.emailguard.io/api/v1/spam-filter-tests/{uuid}
When you make the GET request, you'll receive a comprehensive breakdown of your email's performance:
{
    "data": {
        "uuid": "a08a75e7-28c1-44db-a414-a28021c99e69",
        "name": "EG API DEMO",
        "status": "succeeded",
        "spam_filter_email_address": "[email protected]",
        "sent_from": "[email protected]",
        "sending_server_ip": "XXX.XXX.XXX.XX",
        "score": 3.89,
        "score_breakdown": {
            ...
        }
    }
}The score field (3.89 in this example) is your overall spam score. Lower is better, you're aiming for scores close to 0 or negative.
The score_breakdown contains dozens of individual checks that contribute to your final score. Here are some key ones to pay attention to:
Infrastructure & Authentication:
MX_GOOD (-0.01) - Your domain has working MX records configured properly
R_SPF_ALLOW (-0.2) - SPF verification passed
R_DKIM_ALLOW (-0.2) - DKIM signature verified successfully
DMARC_POLICY_ALLOW (-0.5) - DMARC policy check passed
Content & Format:
MIME_GOOD (-0.1) - Your email uses recognized, properly formatted content types
Reputation Issues:
RBL_SENDERSCORE (+2.0) - Your sending IP is listed in senderscore.com's blocklist (this is adding to your spam score)
BAD_REP_POLICIES (+2.0) - Email contains valid authentication but is flagged by reputation systems
Your final score is influenced by many factors beyond just the ones highlighted above. The complete score_breakdown includes checks for:
Your copy and subject line - Spammy words, excessive capitalization, misleading subjects
Your infrastructure setup - IP reputation, domain authentication (SPF, DKIM, DMARC)
Email format - HTML structure, image-to-text ratio, broken links
Sending behavior - Recipient count, sending patterns, list quality
Reputation databases - Whether your IP or domain appears on any blocklists
Each email you test will have a unique combination of these factors, which is why it's important to test your actual production emails rather than generic samples.
Why Use the API?
Running tests via API is particularly useful when you:
Want to automate testing as part of your campaign workflow
Need to test multiple variations quickly
Want to integrate spam testing into your own tools or scripts
Need programmatic access to detailed scoring data
The API gives you the same robust testing EmailGuard offers in the dashboard, but with the flexibility to build it into your existing processes.
That's it! Two simple API calls and you've got comprehensive spam filter analysis without leaving your workflow.
